Categories
Fishing Tips & Tricks The National Angler

EARLY SPRING FISHING TIPS – RAPALA SHADOW RAP

EARLY SPRING FISHING – RAPALA SHADOW RAP

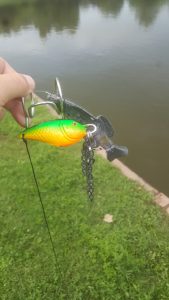
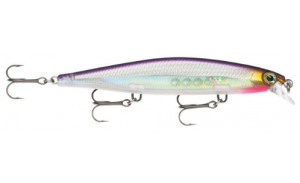
Fishing in the early spring requires finesse and patience, suspending jerk baits like the Rapala Shadow Rap work perfectly. This bait is lightweight, dances side to side and shimmies on the suspense when all of my strikes occurred. If you are targeting cold weather fish from freezing to the spawn. In casting vicinity of the bank from a boat or the bank at 45-degree angled casts near structure will work best.  The Rapala Shadow rap will serve you fine.

This was my first trip out on Rocky Gorge Reservoir in Maryland and on my boat for 2018. Last few years was dedicated to throwing big swimbaits. Decided this day that going back to what I know was first when I found success in fishing a certain technique I would switch over to swimbaits. I judge success on catching 5 fish on one lure in a day, just like a tournament. When I hit that mark I will change things up. That has worked well for me in the past and going back to that direction for 2018.

This day started out cold and didn’t really warm up either. The water temp was 42 when I got on the water and managed to make it up to 45 by midafternoon. The air temp started at 28 and ended up getting to 50, but with the wind blowing, you could hardly tell.

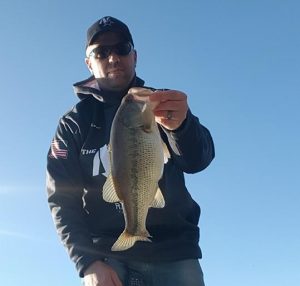
As soon as I got on the water, I really wanted to throw a new swimbait. However, something told me to go for the jerk bait. 3 casts in I caught my first fish and biggest of the day, a 21 in largemouth bass. Unfortunately, for me, my scale wasn’t working so no weight. That is what I need to get me going for the rest of the day and year.

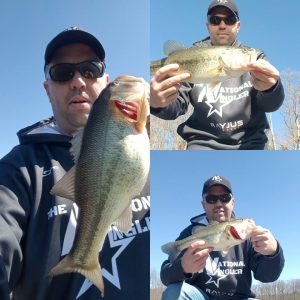
I worked that bait the rest of the day near shore and cast at 45-degree angles specifically looking for structure to locate bass in about 8-15ft of water. The last and most important part of fishing this time of year with these baits is patience. After the cast, I would pull the bait down a few feet and wait about 10 sec. Then I would pop the bait a couple time and wait at least 10sec. I repeated this over and over all day. It directly resulted in my pulling up 4 fish for the day and here are the other three below.

Early spring with super cold water, the biggest thing is to slow way down. So, when you think you are going slow enough, go slower and you should see some results.

If you have any questions, please ask below!

Semper Fish!

Joe, The National Angler

Categories
Fishing Tips & Tricks The National Angler

Angler Express Tackle Box OCT 2017

Subscription tackle boxes are an extremely popular way to try new tackle. What if there was an option to get a more tailored box for the season and body of water that was selected by a professional at an individual. That’s exactly what you get when you get an Angler Express Tackle Box. They come in increments and can be ordered monthly or a single.
Here is the exact wording from www.anglersexpress.com

Check out my video review: https://www.youtube.com/edit?video_id=g1mCtkj1sEQ

“Anglers Express Tackle Box – The Express Tackle Box is a custom-tailored box filled with tried and true lures and/or terminal tackle designated for your lake, river or favorite fishing hole. Our boxes can be orders on a 1-time basis or can be ordered as a monthly subscription. The Express Tackle Box also comes with a custom write up describing your LUNKER SOLUTIONS from Anglers Express. This write up will explain the theory on what should be happening during a given month and what lures and techniques will work the best. Our boxes may be plain jane but our lures are not!!! There are 2 ways to order. Either a 1-time purchase or a subscription. If you choose the subscription model you will receive 1 free monthly box with the purchase of 12 months. We are calling this our fishermen’s dozen. 13 boxes for the price of 12. Your credit card will only be charged on the 1st of every month and your boxes will leave the same day. There will be a $5.00 shipping charge added to all boxes under $50.00. If you choose to unsubscribe to the monthly box please email us at info@anglersexpress.com or call us at 844-204-FISH (3474). If you choose to email please make sure you include your name, email address, and phone number. Thank you very much for choosing Anglers Express Tackle Box.”

If you want a more tailored box for your needs this is a must! Reach out to Angler’s Express and ask for a custom-tailored box for your area.
Semper Fish!
Joe, The National Angler

Categories
Fishing Tips & Tricks Swimbait Mayhem The National Angler

Lure Retrievers, they work!

Lure Retrievers, they work!

Lure retrievers are a necessity that every angler needs. On the boat or the bank, from cheap to expensive lures, this is a must have. If you have one, use it! Lure retrievers can be a pain to use, but will save your gear in damage and complete loss.

I look back at fishing since I was a kid and think about all the lures I could have saved from being lost to snags on the bottom, or how many hooks could have not been bent from me pulling hard. I remember fishing as a kid on my boat. The lake was crystal clear and I lost one of my favorite lures on a log. The lure was in 15 plus feet of water and there was nothing I could do to get it back. Snap! My line broke and the lure will be part of that log for a long time.

It wasn’t till I recently got into throwing big swimbaits that I realized that I needed a lure retriever. When I started buying some of the more expensive lures, I was really hesitant on using them for the fear of losing one or snagging. I watch several people talk about lure retrievers on Facebook groups. I knew I needed one. I just wished I would have remember when I snagged one of my custom swimbaits.

Check out my video on YouTube here 

I want to hear your story, tell me when you should have used one or the big bait you lost! Or, are you still on the fence about getting one? Actually, show everyone your favorite store bought or custom made lure retrievers below or on my Facebook group “SWIMBAIT MAYHEM” 

Semper Fish!

Joe, The National Anglerlure retriever in action

Categories
Fishing Tips & Tricks The National Angler

Waterproof GoPro Camera Storage

Waterproof GoPro Camera Storage

Waterproof GoPro Camera Storage: This waterproof Plano tackle box keeps cameras and accessories organized on and off the water. 

As an angler and amateur filmmaker, I need a waterproof camera storage solution that fits the needs of a filmmaker and an angler. This waterproof Plano tackle box is the ideal solution for me to keep my cameras and accessories organized on and off the water. 

Starting off with one camera storage was never really a concern for me. Especially since my first camera for shooting YouTube videos was around $75. I slowly started to add cameras, batteries, cables, and accessories to my collection. I routinely found myself out fishing and forgetting something at home or just not being able to find it at all.

I decided I needed to find a solution to keep everything safe and dry. Even though some of the cameras are waterproof, not everything is though. So waterproof was a top priority to find a storage solution. I quickly found that I could use material that is commonly use as underlayment for hardwood and laminate flooring, plus it helps blocks out some light to keep the contents cooler.

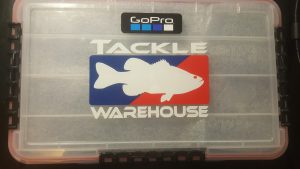
Waterproof GoPro Camera Storage Tackle Box

I chose the waterproof Plano 1-3 tackle box to keep my cameras and gear organized. The biggest plus for me using this particular box is the fact it fits perfectly in my tackle box.

If you have any suggestions or ideas, please share them below.

Semper Fish!

Joe, The National Angler

Categories
Fishing Tips & Tricks Florida Keys Fishing

SHORE FISHING THE FLORIDA KEYS PART 2

SHORE FISHING THE FLORIDA KEYS PART 2

UPDATE TO MY FIRST ARTICLE, AS I’VE FINALLY KEYED INTO CATCHING FISHING AROUND THE BRIDGES OF THE FLORIDA KEYS!

On my latest trip to the Florida Keys, I wasn’t afforded a lot of time to fish while I was working. I was able to sneak in a few hours after my flight arrived and one late evening after work. I took the lessons from my first trip and put them to work the first day. It resulted in some small fish and even some that I have never seen before. The one thing I was missing was weight to get down and stay down in the currents.

My last night in the Keys I checked out the bridge going from Key West to Fleming Key. You do need a government ID to access this bridge. However, you can use the same technique at the many Key bridges along the way.

One thing I wish I would have changed was heavier and more durable line. The line I was testing out was extremely strong, but it was not very abrasion resistant. So I lost all my lures and all but one fish!

The thing I learned on the final night was getting down deep out in the main current out in front of the bridge. I used 2oz jigs with Z-MAN Diezel Minnowz  and metal blade baits. I hooked up with quite a few fish and broke most off. I was able to land this nice Mangrove Snapper that evening. On a final note, the only saving grace, I brought my new Ardent C-Forcereel. The C-Force has plenty of drag to fight some pretty big saltwater fish!

Categories
Fishing Tips & Tricks The National Angler

ONE ROD & REEL – Picking Just One Fishing Rod

Have you ever thought about the one rod and reel that you use the most and couldn’t live without? 

So in my quest to become more productive while on the water and make the most of my precious time, I like to keep things simple. I’ve made more of an effort to fish smaller bodies of water and try to explore when time just doesn’t allow me to get the boat out, or I want to take my girls fishing. I always find myself dragging multiple rods for myself along with the important Barbie Rod and toys! Even trekking through the woods to get to a small body of water can be precarious with a couple of rods. I also through my Deeper Smart Portable Fish Finder and Water Wolf HD Underwater Camera while fishing, so I have to make sure the rods I bring can handle chucking those things into the water. A rod that can handle a heavy lure or camera to a small beetle spin.

So, I’m not a professional fisherman and being a professional is not in my sights currently. My goal is to show you what I used and why I picked a certain product. I’m not specifically endorsing and I’m also not working for any of the companies mentioned in the article. The target setup is a rod, reel, and line choice that compliments all my requirements, but it may not be 100% ideal and that is okay by me. 

The Rod:

The rod is a Tsunami AirWave 7.5ft Surf Rod that I picked up from Bass Pro about a year ago, and boy to I love this thing! It is the one rod that is always with me when fishing.  The other specs to the rod include a slim rubber grip that helps support the 10-20lb line class that is rated for 1.5-2oz. lures. When I was picking out the rod I need something that could handle flipping, pitching, catfishing, surf fishing, light saltwater. Heck, I’ve used this for crappie and bluegill when I fishing with my daughter. It has also become the workhorse of “The National Angler”. It is the rod I use for testing all my lures and my Water Wolf HD camera, and can’t forget the Deeper Smart Fish Finder. 

The Reel:

Luckily for me, I already had a reel in my stash that fit my needs for this solo fishing rod application. What I’m using is the Okuma Trios High-Speed Spinning Reel. The number one choice for this reel for this application and buying was for the speed. The reel is 6.2:1 that picks up 34 inches of line per turn. My personal thinking is; I can always slow down but speeding up can be hard. Pitching, flipping, and top water are my number one choices for the high speed.  The reel also comes in at a moderate 10oz. and a great drag set up. The one thing that had me sold on this reel was the high speed and man can this thing pick up fishing line in a hurry. 

The Line:

Well, I’m not actually using just one type of line for this reel. The main line I’m using is 50lb test Tuf-line XP in green. Wait, I did say I was using more than one type of line. Some applications like my Deeper, Water Work, and Flipping I’ll tie braid directly. When the conditions require, say monofilament for topwater or fluorocarbon for clear water, I can easily tie a certain amount of leader directly to the braid.

I’m curious, after reading this what would you select as your choice for just one rod and reel to do it all?

Semper Fish!

Joe, The National Angler

Categories
Fishing Tips & Tricks The National Angler

Quick Clips – Time Saving Fishing Tip


I recently wrote an article about keeping things simple with a three-rod setup for bass fishing. Now, this may not be applicable to every type of fishing, but it’s the idea behind which is the goal. One thing when I’m fishing from my buddy’s boat or walking the shore of a local pond I can only bring a couple of rods. However, I always desire to constantly switch baits some days, maybe from a jig to top water. It’s the constant tying of knots that can consume your trip. For me, I usually only go out for a couple of hours, especially when walking local ponds. Well sometimes because I’m rushed, I spend an enormous amount of time changing baits and tying knots over and over.

Take a look at professional bass fishing. The pros in today’s tournament trails carry a crazy amount of rods in their boats already rigged up. Sometimes you will see 15 to 20 rods just on the deck and that’s not including what’s packed away in the rod lockers. To the pros, time is money and even thinking about having to re-tie lures is not acceptable. I’m not a tournament guy, but my time fishing is usually precious time away from the family. I don’t want to waste what little time I do get.

As a kid, I always tried to use a snap swivel, but it just never worked out and it was just too much. Plus it was one extra thing to grab more weeds when I was fishing. It just never made sense for me to use that type of terminal tackle when fishing for something other than maybe catfishing.

Plus, growing up as a kid all I ever wanted to do was be a pro in the Bassmaster tournament trail. Pros don’t use snap swivels on crankbaits, jigs, spinner baits, and finesse baits. Again, when money is on the line a person would not want something to mess up the action of the lure. Tying directly to the lure with various knots seems to be preferred.

Today, after a decade in the military and another to go, I want to keep things simple as possible. The aspirations to become a pro angler have gone, but the desire to fish hasn’t and never will change. My biggest focus is making sure my fishing hobby or addiction doesn’t take away from my family. Today my focus is getting more from my time on the water and being productive and keeping it simple not complex.

Like the pro, I want to take advantage of my time. Instead of carrying dozens of rods already rigged I found a piece of terminal tackle that is new to me, and doesn’t seem to be used by too many people. This simple new piece of tackle has really been a game changer for me.

Quick clips, quick snaps, snap (minus the swivel) or whatever you want to call them are a great opportunity to speed up the process of changing lures and saving time on the water. Now some lures, like a spinnerbait with no defined “eye” with just a bent arm. Well, this piece of terminal tackle will just not work that well. Anything with a defined “eye” and you are good to go! Shockingly I’ve heard before you should always tie directly to the lure because it could take away from the action of the lure. Look at most all crankbaits, even those that are $15+, they all have split rings or snaps on them. Well…guess what…these clips essentially do the exact same thing.

So instead of the terminal tackle on the lure is just on the end of your line, no big deal then! Well, maybe to some really picky technical fisherman this won’t work. For me, this is ideal. It may take away a little action on the lure and cause me to not catch a few fish. I’m really ok with that because this one little piece of terminal tackle does one thing, it gives me more time on the water, with the little time I get. That is the most important part of all this, maximizing your time on the water.

I will say that my fishing partner has got hooked on using these things as well. He only brings two rods with us fishing and now he LOVES these little things. We recently fished the lower Susquehanna River on the northern Chesapeake Bay.  We were both swapping out lures to see what was biting. Fish an area, then switch things up, both bass below were as a result of quickly changing lures.

Not all things can be good, and there are a couple of downsides to using these help pieces of terminal tackle. First, they are a little hard to figure out and get used to because of size, and this might cause some distress to those anglers. So the first thing is just getting used to these things, once you do that, you are Go To Go! Second, some eyelets and lure attachments are either too small or just don’t work. I few jigs I tried, didn’t work because the eyelet was too small. Also, a bent arm spinnerbait for example, will also not work because now the clip will slide up and down the arm of the spinnerbait, which is no good. Lastly, and this was kind of a fluke, but I got my brand new $15 Picasso Lures FX Shock Blade wrapped around a try. While pulling on the line to free it, the pressure from being wrapped up must have open the arms of the Norman Speed Clip, and then it happened. In Slooooow motion, my FX Shock Blade floated off the end of the line and plopped in the water, SAD L.  Also the Norman speed clips are a little tricky so with big fingers, cold hands or gloves they are difficult. Also to note are baits that require the angler in inpart an action on a lure to make it do something, like a jerkbait, spook, spoon, etc. These baits and do to the jerking motion tended to get hung up between the split ring and the snap. If you want to stick with the snaps on everything you use, some modification will need to be done, like removing the split ring and attaching the snap directly to the eye of the lure. 

Over a period of a month I’ve had the opportunity to try other clips that I have found mostly at the local Bass Pro, and this is due to the Quick Shot Snap being sold out and the results have generally been the same with all the competitors

My ultimate recommendation would be to go with the Bass Pro Shops Offshore Angler Quick Shot Snap, has a slight break-in period to loosen up and worked the best for all types of lures. For smaller lures my choice would be the No-Knot Fas-Snap, it is a little smaller but perfect for tiny jigs or flies.

In the end, whatever you want to tie onto or not, is totally up to you! I hope this maybe makes you think of how to help make things more productive on the water the next time that you are out fishing! If you have any questions or comments, I want to hear from you.

Semper Fish!

Joe, The National Angler
Categories
Fishing Tips & Tricks Florida Keys Fishing

Shore Fishing Key West Florida

On my first day in the Keys and after a long drive, I settled into my hotel and checked out the bar, and the bartender just happened to be a local fisherman as well. Steve was great with the info and told me a few places to check out and what bait to take. The reassuring part was the fact that the areas I had already discovered online and the baits to use, well those were already recommended earlier in the day.

The next day after work I set out to check the first few spots on Key West! I started out on White Street Fishing Pier. I spoke with a few locals that were fishing with squid of course and decided to break out the travel rods. On the pier, the popular technique, was the squid for smaller fish near the pier, then cast the smaller fish farther out for something better. I chose to ignore this and throw lures and jigs all to watch a few fish strike and follow my baits.

Shore Fishing Key West
Western Jetty on Smathers Beach

 I moved on to fish a few more spots working towards the airport. Heading towards the airport the spots I chose were; the corner of Bertha St & S Roosevelt Blvd, the third rock jetty on Smathers Beach (all were recommended), and the corner near the airport where S Roosevelt heads north just past the Best Western. It was at this corner I had my first strike from a small barracuda. I also spoke with a local, who again recommended squid, hum…shocker!Shore Fishing Key West

My final day, I took the some of the advice and bought bait, well not squid but shrimp from a pretty cool tackle shop and bar. Key West Bait and Tackle is a pretty cool little hangout, not only to get bait but talk with some locals as well.  I got the shrimp and headed to Fort Zachary Taylor and fished the rock jetty next to the beach.

I set up on the rocks and decided to try my lures again just in case. Well just in case nothing decided to strike. I tied on a small jig with the shrimp and proceeded to feed the local population of very small fish with my shrimp. Those little….kept stealing my shrimp…… I decided to pull out the Berkley Gulp shrimp that I brought with me and put a very small piece on. If you leave the jig in place just barely moving it with the Gulp, you will catch smaller fish near the rocks by the shore. I did catch a small bait fish and threw it out on my bigger rod and proceeded to try to catch more bait.

I did manage one decent fish to the shore but I have no clue what it was. It did put up a good fight, which most saltwater fish seem to do. IMG_20160512_201137

Within minutes, I had something pulling line off my reel. Something so BIG, it literally took all my line….:( I spooled back up, but could hook any smaller fish with the power bait so I put on a couple of shrimp and chucked it back out in the deeper water. Again, within minutes the line began to scream until……wait for it…….snap. No more line….. At this point, I didn’t have any heavy sinker left and just used the rest of the shrimp to find the local population living amongst the rocks. In the end, I had a good time and got some well-needed sun. Just wished I would have listed better. Maybe next time in Key West!

Recommendations for shore fishing the Keys and Key West.

The best bait to use to avoid the bait stealer is squid and Berkley Gulp.  Any shiny for barracuda! Small jigs with bait to catch more bait. Then send the smaller bait or the bait you bought farther out to deep water to catch something else. I’m very confident that this info will bring you luck in the Keys, that I on my next trip I promise to follow my own advice and use this info and let everyone know how it works.

Semper Fish!

Joe, The National Angler
 

Shore Fishing Key West


Categories
Fishing Tips & Tricks Florida Keys Fishing

Shore Fishing the Florida Keys

I was lucky enough to be able to travel to Key West for a work trip and a last minute one at that. So with Key West travel and booking things late, all meant I had to drive from Miami to Key West. It is a 3 plus hour drive depending on traffic, so why not take advantage of the trip to check out the shore fishing on the way down and opportunities to fish from the shore. Now, I’m not going after any trophy fish or highly targeted species, just looking for something to catch after work for some entertainment. Some people might get caught up in the Key West nightlife and the happenings on Duval St. However, I chose to spend my extra time scouting the local fishing scene.

So I should frame this post as what not to do because obviously you will find out I didn’t take the advice of multiple people I talked to. I least I can say I tried something different. Shore fishing the Florida Keys is really simple and try to listen to the advice, that I chose to ignore and you will find success fishing the Keys!
I started the drive down with at stop at the Islamorada World Wide Sportsman or more fondly know as Bass Pro. I was lacking a heavy duty travel rod and the local Bass Pro in Baltimore did not have what I wanted. There I picked up a new Tsunami travel boat rod, and what I great investment that was (review to come!) While there I also took the time to check out the area. This is a great stop to find motivation to fish the shallows of the Keys. The docks surrounding the Bass Pro are covered in HUGE 5-6ft Tarpon, which is lazily cruising around knowing that they are being left alone! That site alone had me all amped up to go fishing.

 
As I got back to the drive to Key West I made a few stops at various bridges and keys to check things out and see what the locals were catching. It seemed most people were having luck with various grouper, snapper, and barracuda near all the bridges. On the drive down the most notable bridges that seemed to be producing and popular with the locals; Indian Key @ Indian Key Channel, Lower Matecumbe Key @ Channel Two, the bridge between Long Key and Duck Key. If you want to throw a fly a decent place I scoped out was at Bahia Honda State Park. The front side of the island around the beaches and near the bridge, with the right wind, looked so promising for a fly rod. However, the wind was not cooperating with me that day so I moved on. The ranger at the park did tell me when the wind is right, so is the fishing! This is where I ended my day and headed to the hotel as the sun was setting. 
Recommendations for shore fishing the Keys.

Honestly, if you can find a bridge or a spot on the side of the road to fish, you are going to catch “something”! The reoccurring fishing theme for the various bridges was fresh bait, shrimp or squid. I high recommend two rods. One set up with a small jig head and bait it with squid to catch smaller fish. Then throw out the smaller fish on circle hooks to catch something bigger!!!  The best bait to use to avoid the bait stealer is squid and Berkley Gulp. Any shiny baits or lures for barracuda! Small jigs with bait to catch more bait. Then send the smaller bait or the bait you bought farther out to deep water to catch something else. I’m very confident that this info will bring you luck in the Keys, that I on my next trip I promise to follow my own advice and use this info and let everyone know how it works.

While this is a not a complete list of places, it is a start to discover shore fishing the Florida Keys!
Semper Fish!
Joe, The National Angler
Categories
Fishing Tips & Tricks

Beginner 3 Rod Setup – How to select your first fishing rods.

Beginner 3 Rod Setup – How to select your first fishing rods. 

When I first started fishing as a kid I wanted to be just like the pros! Heck, I even had my first boat at the age of 13 and used a transom mount trolling motor on the front, just to be cool. I then began to collect every piece of fishing gear I could get my hands on; lures, rods, reels, tackle boxes, etc. I think at one point I had almost 15 random rods and reels. As a kid and would drag every one of them out with me on my adventures. As an adult, I still have a vast array of rods for almost every situation. I have rods for the surf, catfishing, crappie, bass and even fly rods (salt and fresh). I had an aha moment while reading an article about 7 years ago and it was to keep things simple from tackle to rods. When it came to rods it focused on your strengths, and I had three techniques I fished most, finesse, swim jigs, and topwater.

I found that if I had three rods that match my favorite techniques I would save time and room in my boat. I also discovered along the way, that these three rods worked for other situations when needed as well. I started carrying just three rods back in 2009 and have since added a few to a daily arsenal. I have rod holders mounted on my boat and can hold 8 and that is the max I will take. Today I do carry multiple rods, but the base of what I bring is still geared toward the three techniques.

First up, FINESSE FISHING, and what I have is an older Abu Garcia 6’6” Medium Light (ML) spinning rod. The reel varies based on what I’m fishing for. I will say normally I have a reel spooled with 8lb fluorocarbon (sensitivity and sight). If you are starting out and new to fishing really any Medium Light to Medium spinning rod will do. As you advance and get confident to the various techniques of FINESSE Fishing picking rods specifically designed for an application like shaky head and drop shot, will have better performance, but with a higher price tag. So why finesse fishing? Well, it’s simple I fish some highly pressured rivers in lakes that are in and around Washington DC.  The Potomac River and my favorite watershed Rocky Gorge Reservoir get pounded by anglers. I make it a goal to fish behind people and catch what they miss ; ). So finessed fishing is my favorite technique for bass. 

Next, SWIM JIGS, and with this application, I am using another Abu Garcia and more specifically the first Veritas model. It measures 7’6” and is Medium Heavy (MH). In regards to the reel situation, it changes all the time, but I do like a fast retrieve. Faster is better for me because I can always slow things down. The long rod allows me to really chuck a heavy jig out in the water. Along with casting the swim jig, and with the length of the rod I will switch it up from casting, and go straight to flipping and pitching. As far as line goes, I’ll use braid on the Potomac River with all the weeds and switch to fluorocarbon in the local reservoirs that don’t have a lot of heavy cover. This rod can be used for so much more; spinner baits, Carolina rigs, Texas rigs, swim baits, and even catfishing : ). Again, if you are starting out pick something simple and then work your way up. All the major rod manufacturers produce very decent models that start around $40 to $60 and work great. So why swim jigs, we all know bass jigs produce. I just get bored and would rather fish it like a spinnerbait that it. Also, when I’m throwing frogs on the Potomac in the slop and I miss a fish, I quickly follow up with a jig and usually have success!

Last, TOPWATER FISHING, nothing is better than throwing a popper or a frog and watching a bass explode on the lure. When I started out top water fishing especially with a walk the dog lure was always difficult. However, I bought my first Shakespeare Ugly Stick and it was that action that made all the difference is my topwater techniques. The long flex through the entire rod has always helped me impart the best action on a lure, thus producing more fish on the end of the line. I have switched and now use s-glass rods and are usually sold as “Crankbait Rods”. The first two rods mentioned are usually made of carbon or graphite or a combination of. The one I use now is Wright & McGill Skeet Reese S-glass crankbait rod and measures 7ft. Sold as a crankbait rod, this works great for me as a topwater rod as well. It’s the long bend in the rod  and that is the reason I like them so much. 

As a side note for those anglers who are not yet comfortable with baitcasting reels. It’s really OK to use a spincast reel. Heck I still have my first Zebco 33 that was passed down from my Great Uncle and is probably from the 70’s. Honestly, there are some really nice spincast reels out there today, to get you started. 
That rounds out the baseline for the rods that I use when fishing. It’s geared towards bass mostly, but I still use those rods for other fishing methods as well. When starting out fishing, I would try to really keep things simple, until you get the hang of things and want to venture into more technique specific and higher priced rods.
Selecting Fishing Rods
If you ever have any questions, feel free to reach out to me! Email or check out on Social Media!
Facebook, Instagram, Pinterest, Google+, Twitter, and email thenationalangler@gmail.com
Semper Fish!
Joe, The National Angler